This week for TFJ Inspiration Ave we are creating to the theme of “Deck the Halls”. Here I have created a Christmas themed reliquary dome.
If you would like to see a step by step tutorial click the link
here.
For this project I used: a reliquary dome, salvaged soldier, vintage bells, confections, pine twine, iron gates, faceted stars, bottle brush trees, baubles, bubbles, distress glitter, snowfall texture paste, collage medium, hot glue, tinfoil, and twine.
For this Christmas project I am starting with a base of a reliquary dome. I chose this because it has a large base to work with and great height to build upwards with.
To start I crumpled up some tinfoil to make the foundation of some snowy hills. I then attached the tinfoil with a surebonder hot glue gun.
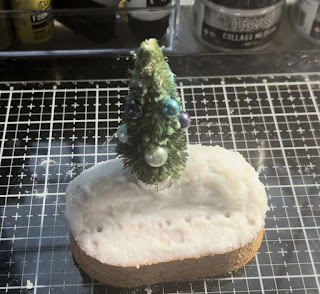
Once the structure for the hills was in place I then added a bottle brush tree. I attached the tree with more hot glue and pushed the base into the tinfoil.
After the tree was in place I then covered the tinfoil and cork base with distress snowfall texture paste. I applied the snowfall paste with one of the Ranger pallet knives.
Here is the fully covered base below. I absolutely love the snowfall texture paste. When it dries it turns into a sparkly semi transparent texture.
Next it is time to decorate the tree. I used some alcohol inked babbles to decorate the tree. These I glued to the tree with some collage medium.
Now it is time to add the altered iron gates. I pressed the gates into the still wet snowfall paste to leave myself some guidelines. Then I added some hot glue over the indentations.
I then pressed the gates into the impressions and the hot glue. This gave the gates a solid foundation to rest on.
With the gates in place I then added an altered salvaged soldier in front of them. I altered the salvaged soldier with distress paints lumberjack plaid, aged mahogany, dried marigold, black soot, and tarnished brass.
Then I added an altered wreath adornment. I altered the wreath with distress glazes lumberjack plaid and rustic wilderness and some distress embossing ink.
Now for some glittering details. This year no Christmas scene is complete without a dash of distress glitter. I added some glittered confections around the front of the cork base and a thick board glittering star to the tree.
For the last detail inside the dome I added some sparkled bubbles. With a bit of collage medium and glitter they transform into snowballs.
Now it is time to decorate the base of the dome. For the base I have added some pine twine and some jute twine.
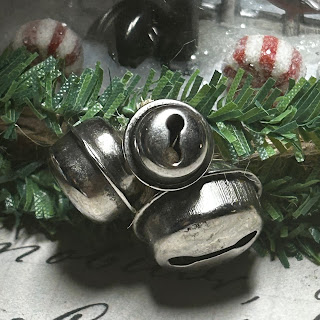
With the jute twine I attached three Idea-ology vintage styles sleigh bells.
Here is the finished dome. For details about the embellishments click the links below from some Idea-ology alterations.


Comments
Post a Comment