TFJ Challenge: A rather blustery day: With Distress Micro Glaze
Hello and welcome to a new challenge for The Funkie Junkie Boutique Blog. This weeks challenge was inspired by Pooh Bear's quote "It's a rather blustery day." Pooh Bear struggled against the windy day and you can share something you struggle with in your art! It can be a technique, color palette, tools, or supplies that you find difficult to use. Share them with us along with your story on what you struggle with!
The guidelines for entering are simple: create a new vintage or shabby chic project following the challenge theme, link it to your post (not just your blog) and also include a link to this challenge in your post. You can combine our challenge with up to 10 challenges (including this one) to be in with a chance for winning. If you are entering through a public forum (such as Instagram) you'll need to include the words 'Funkie Junkie Boutique Challenge'. Also, please turn off your Word Verification so our Design Team can leave comments on your blogs
For this challenge I have decided to feature Distress Micro Glaze. I definitely have a love hate relationship with this product. When it works for me the results are fantastic and when things go wrong they go really wrong. So let’s see how things go this week and play with some micro glaze. Click here for video instruction.

Below is a list of products I have used in this make.

A note about micro glaze: in my experience I have found this product to be sensitive to humidity and heat. Also this is a product that requires a fine balance of too much and not enough when applying it to various substrates. So let’s go ahead and start creating.


Below are some links for some inspired shopping at the Funkie Junkie.
Micro Glaze https://www.thefunkiejunkie.com/Ranger_Distress_Micro_Glaze_TDA46967_p/ranger_microglaze.htm
Collage Medium https://www.thefunkiejunkie.com/Ranger_Distress_Micro_Glaze_TDA46967_p/ranger_microglaze.htm
Distress Ink Salty Ocean
https://www.thefunkiejunkie.com/Distress_Ink_Pad_Salty_Ocean_TIM35015_p/tim35015.htm
Distress Ink Cracked Pistachio
https://www.thefunkiejunkie.com/Ranger_Tim_Holtz_Distress_ink_Pistachio_TIM43218_p/tim43218.htm
Distress Ink Salvaged Patina https://www.thefunkiejunkie.com/Distress_Ink_Pad_Salvaged_Patina_TIM72737_p/tim72737.htm
Distress ink Tumbled Glass https://www.thefunkiejunkie.com/Distress_Ink_Pad_Tumbled_Glass_TIM27188_p/tim27188.htm
Distress Ink Oxide mustard seed
https://www.thefunkiejunkie.com/Tim_Holtz_Distress_Oxide_Mustard_Seed_TDO56089_p/di_tdo56089.htm
Distress Ink Oxide spiced marmalade
https://www.thefunkiejunkie.com/Tim_Holtz_Distress_Oxide_Spiced_Marmalade_TDO56225_p/di_tdo56225.htm
Distress Ink Oxide abandoned coral
https://www.thefunkiejunkie.com/Tim_Holtz_Distress_Oxide_Abandoned_Coral_TDO55778_p/di_tdo55778.htm
Distress Ink Salt Water Taffy
https://www.thefunkiejunkie.com/Distress_Ink_Pad_Saltwater_Taffy_TIM79521_p/tim79521.htm
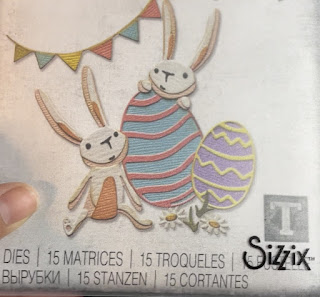
Bunny Games
https://www.thefunkiejunkie.com/Tim_Holtz_Die_Set_Bunny_Games_665850_p/die_665850.htm
Metallic Sticker book
https://www.thefunkiejunkie.com/Tim_Holtz_Idea_ology_Metallic_Sticker_Book_TH94134_p/ido_th94134.htm


Super SUPER SWEET !! That bunny just looks so PERFECT right there in the middle, and I want to reach out and tickle his wittle tummy. ;)
ReplyDeleteI have had trouble with the MicroGlaze also and had no idea anyone else did.
That does make sense; for it to be sensitive like that, and living in Indiana probably added to my troubles. It just never wanted to 'glaze' over for me and produce the tiny crackle I love so much from the Crackle Pastes. I'll have to pay more attention to tips like this in the future...THANKS!
Thank you so much! As crafters it is always fun to keep playing even when things don't go as planned. 🙂❤️🎨❤️
Deleteoh, yes, Microglaze! I could use some more practice with it too. I love your results and that cute card. =)
ReplyDeleteThank you so much! 🙂❤️🎨❤️
DeleteSuch a sweet card! I love bunnies and this one is super adorable! I do love my microglaze, and I'm glad you gave it a whirl!
ReplyDeleteThank you! So far it seems to be a product where the conditions must be just right to make it work without any hic-ups. I had to turn on my dehumidifier to give it the best chance to work. QC tends to be very damp.🙂❤️🎨❤️
Delete