Hello and welcome to a new challenge for
The Funkie Junkie Boutique Blog.
Industrial Grunge: “
Get those gears and other metal pieces out to create a project with an industrial feel to it. Great opportunity to create a guy card or project.”
The guidelines for entering are simple: create a new vintage or shabby chic project following the challenge theme, link it to your post (not just your blog) and also include a link to this challenge in your post. You can combine our challenge with up to 10 challenges (including this one) to be in with a chance for winning. If you are entering through a public forum (such as Instagram) you'll need to include the words 'Funkie Junkie Boutique Challenge'. Also, please turn off your Word Verification so our Design Team can leave comments on your blogs.
For this tutorial I am going to be working with embossing techniques and mixed media. For video instructions click here.
For this project I decided to create a grungy card with gears and a stamped image for the focal point.
Used: 3D folder mechanic, TH metallic classics cardstock, Distress Archival black soot, Distress ink vintage photo, Distress embossing ink, Distress embossing pen, Distress reinker mustard seed, Distress reinker chipped sapphire, Distress reinker tattered rose, Ranger Embossing powder gold, Distress embossing glaze salty ocean, Idea-Ology classic metallic paper, Idea-ology paper pack v1, Idea-ology gears, Ranger grit paste, Collage medium, tonic snips, TH water brush.
To start the project I decided to this card with some stamping and embossing. For the first stamp set I am using Inventor 7 CMS374.

With some distress embossing ink I inked up the stamp and stamped onto some V1 TH Idea-ology paper. There are fantastic backgrounds in all the backs so the background is easily interchangeable. When stamping with distress embossing ink I always tilt the stamp to make sure it is shiny. It the stamp is shiny then I know there is good ink coverage, if not add more ink.
Below is the finished results from embossing with Ranger gold embossing ink.

Next we will work on the focal point of this card. For our next stamped image I decided to use the Professor stamp set CMS373.
For this focal point I decided to color our stamped image with TH distress reinkers and the fine detail Th water brush. For colors I used: chipped sapphire, tattered rose, fossilized amber, and vintage photo.
For some added shine I also embossed the goggle using the fine tip embossing pen and more of the Ranger gold embossing powder.
Once all the coloring and alterations were done I then fussy cut out the professor using the Tonic TH mini snips.
Now back to the background. Since the three is industrial grunge I wanted to add in some bold and textures gears. For this look I used the 3D embossing folder mechanic and some of the new Idea-ology classic metallic paper pack.
To grunge up these gears a bit I added some distress black soot crayon. I scribbled the crayon on and then smudged it with my fingers. After smudging I wiped off extra distress crayon with a damp paper towel. I skimmed the paper towel over the raised surface to bring back a little shine of the metallic paper.
Next I sanded a few of the raised areas with a mail file to add a bit more grunge. In hindsight I should have sanded before adding the distress crayon, but the looks I was going for still came through.
Now that our background elements and focal point are complete it is time to assemble the beginnings of this card.
With the gold embossed piece I tore the paper at an angle and then distressed the raw edge with some vintage photo distress ink. Next I glued the torn paper to the embossed metallic gears.
For our focal point I added some foam squares on the back to give the card some added dimension.
Now that we have our foundation it is time to work on some details.
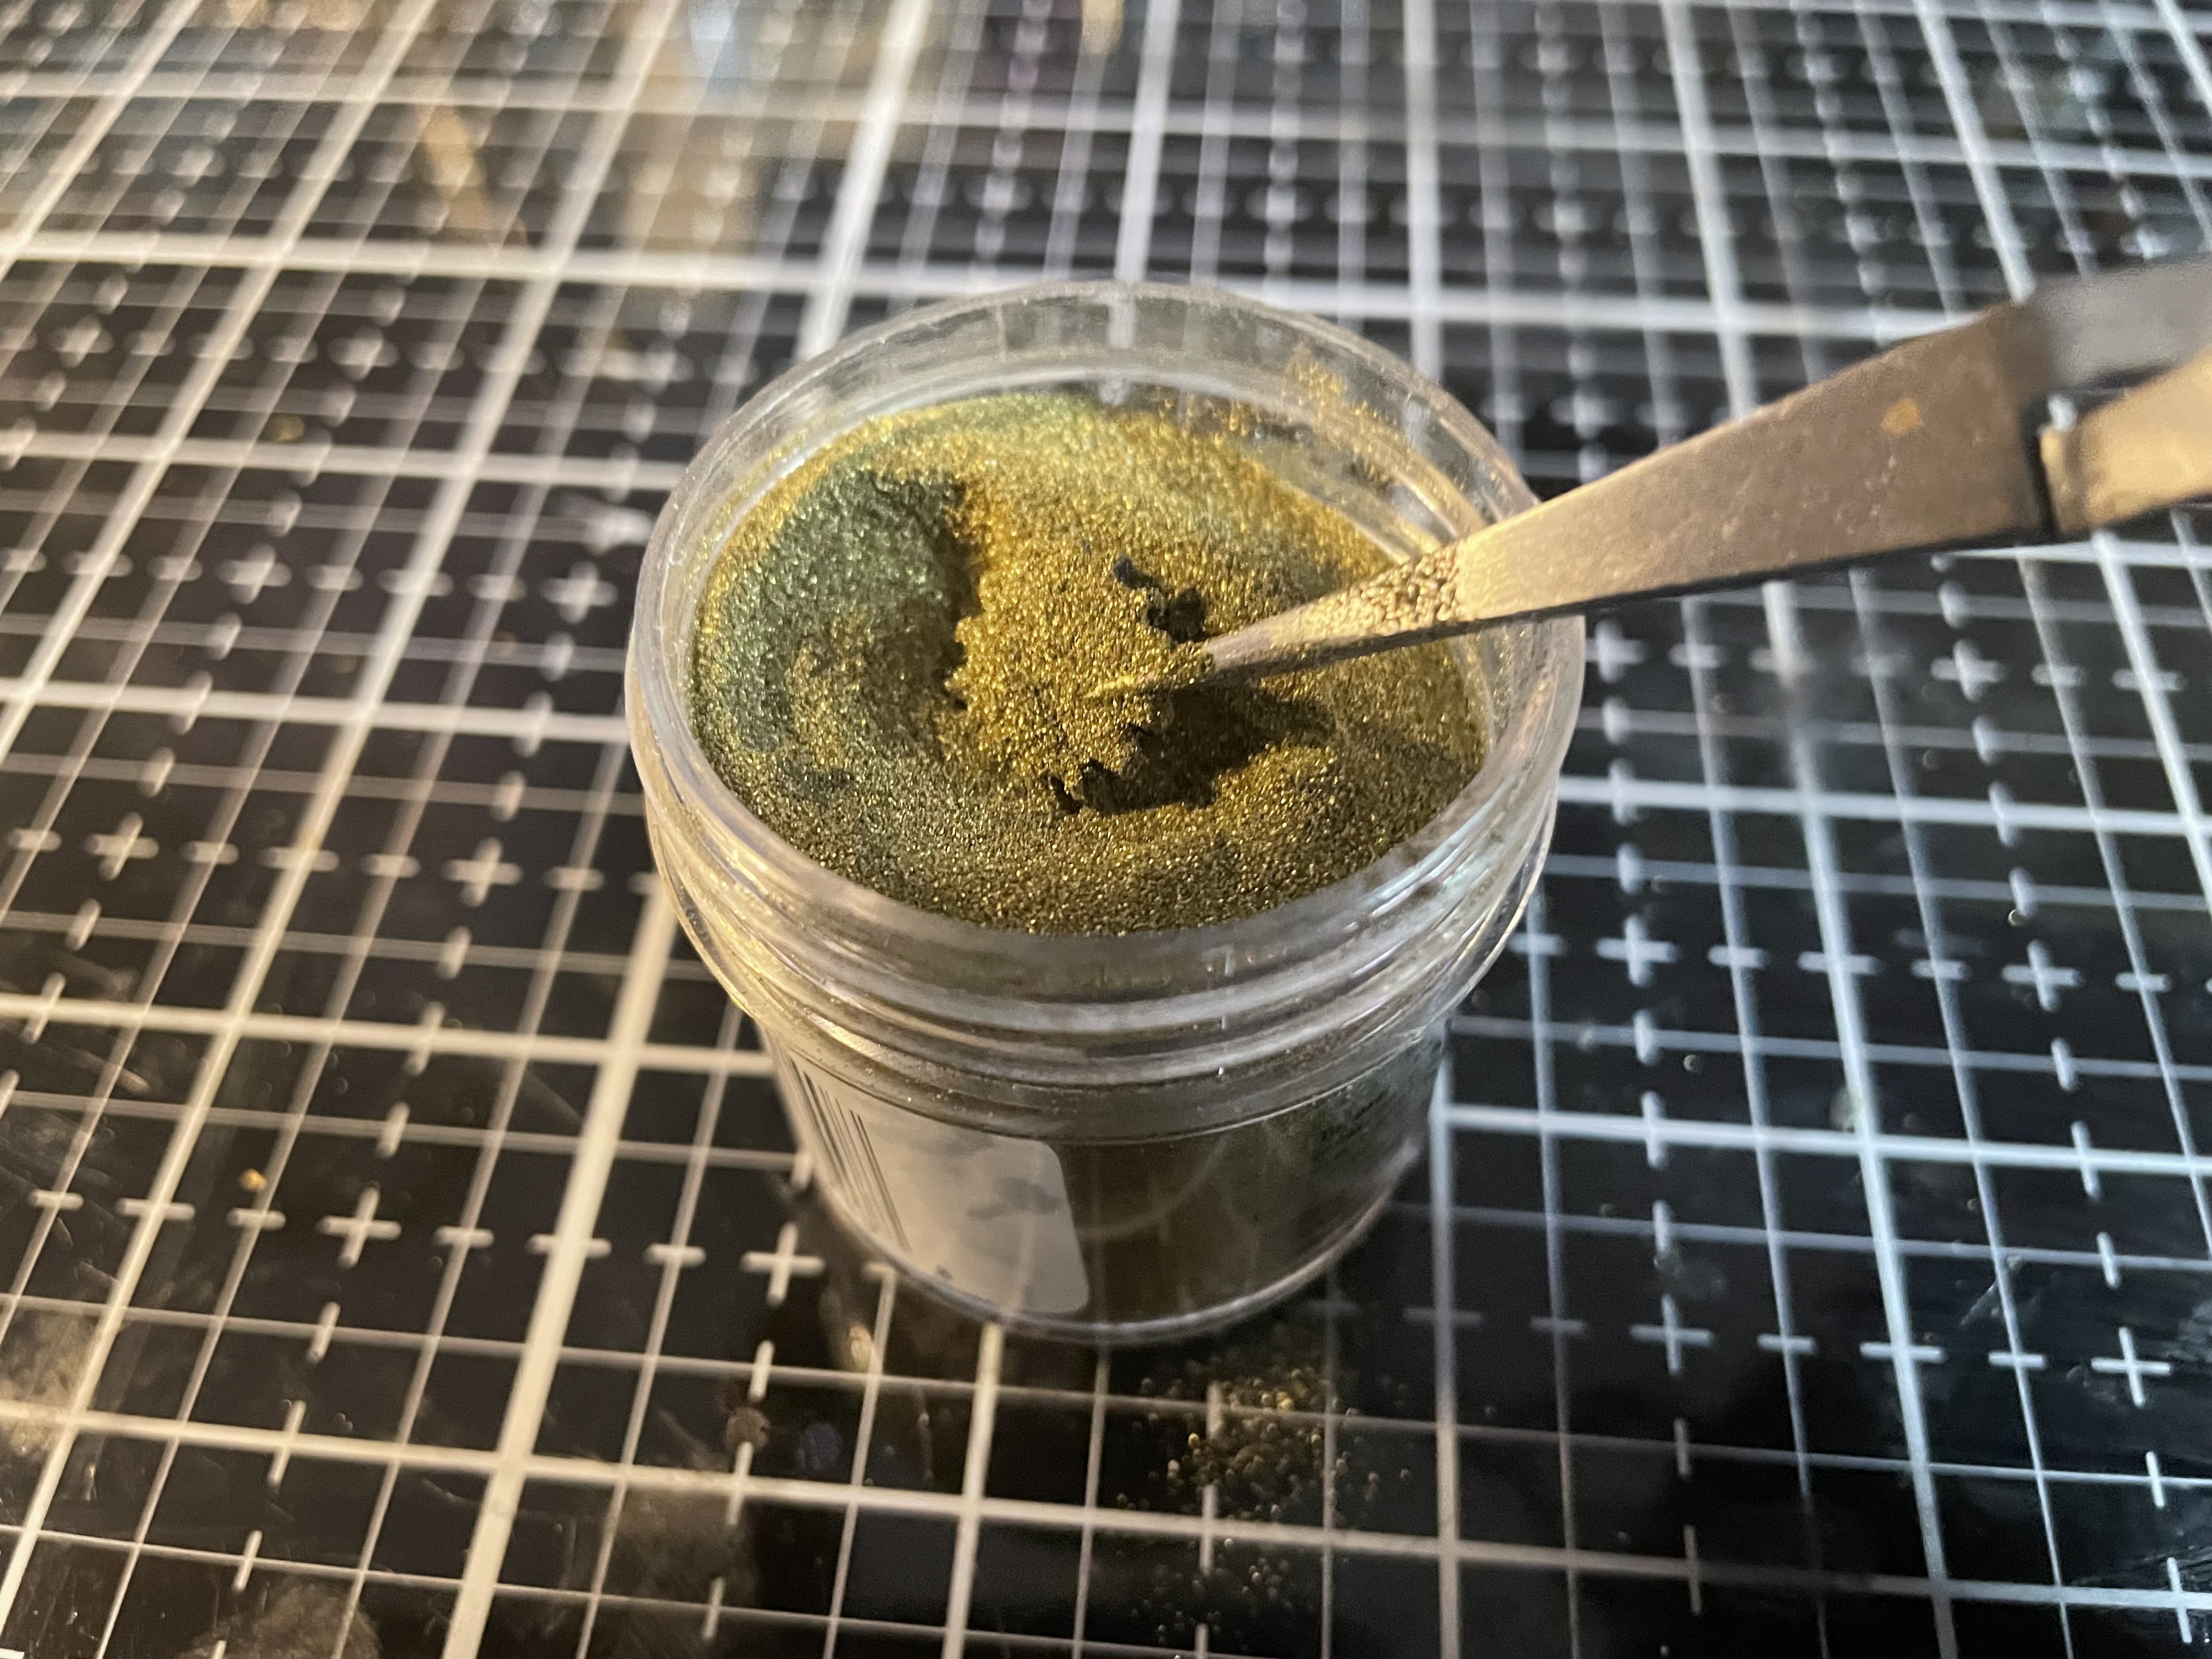
Here I am altering some Idea-ology gears with grit paste. I brushed a thin layer of grit paste on the gears using my fingers.
While the grit paste was still wet I dipped the gears into gold embossing powder and then let them dry.
Once the grit paste is dry I then embossed the gears with a heat gun.
While the gears are still hot and the embossing powder melted I filed them back into the embossing powder to add another layer of gold. I did this to give the gears a molten look. This same look could be done with folding wax. Right now I am just working with the supplies I have on hand, but plan to compare and contrast results later.
Here are the finished gears.
Next I added the altered gears to the card front with some collage medium.
The last element I added to this card was a chip quote which I altered with some vintage photo distress ink.
I can also be found on:
Instagram: @treasuresofthesea_jannak
Thank you so much for joining me here today at the crafty corner. Until next time, happy crafting!
Janna~ 💕🎨💕
Below are some links for some inspired shopping at the Funkie Junkie.
Distress Archival black soot https://www.thefunkiejunkie.com/Tim_Holtz_Mini_Archival_Ink_Pads_Kit_3_AITK64848_p/ai_tank64848.htm
Distress ink vintage photo https://www.thefunkiejunkie.com/Distress_Ink_Pad_Vintage_Photo_TIM19527_p/tim19527.htm
Distress embossing ink https://www.thefunkiejunkie.com/Tim_Holtz_Distress_Embossing_Ink_Pad_TIM21643_p/tim21643.htm
Distress embossing pen https://www.thefunkiejunkie.com/Distress_Embossing_Pen_2pk_TDA71327_p/tda71327.htm
Distress reinker mustard seed https://www.thefunkiejunkie.com/Distress_Ink_Reinker_Mustard_Seed_TIM20288_p/tim20288.htm
Distress reinker chipped sapphire https://www.thefunkiejunkie.com/Distress_Ink_Reinker_Chipped_Sapphire_TIM27232_p/tim27232.htm
Distress reinker tattered rose https://www.thefunkiejunkie.com/Distress_Ink_Reinker_Tattered_Rose_TIM20301_p/tim20301.htm
Distress embossing glaze salty ocean https://www.thefunkiejunkie.com/Distress_Embossing_Glaze_Salty_Ocean_TDE79194_p/tde79194.htm
Idea-Ology classic metallic paper https://www.thefunkiejunkie.com/Tim_Holtz_Kraft_Stock_Metallic_Classics_TH94227_p/th94227.htm
Idea-ology paper pack v1 or v3 https://www.thefunkiejunkie.com/Tim_Holtz_Idea_ology_Backdrops_Volume_3_TH94247_p/th94247.htm
Idea-ology gears https://www.thefunkiejunkie.com/Tim_Holtz_Ideaology_Industrial_Gears_TH94142_p/ido_th94142.htm
Ranger grit paste https://www.thefunkiejunkie.com/Tim_Holtz_Distress_Grit_Paste_3oz_Opaque_TDA71792_p/tda71792.htm
Collage medium https://www.thefunkiejunkie.com/Distress_Collage_Medium_Matte_2oz_Bottle_TDA73031_p/tda73031.htm


He has never looked cooler! What a fabulous industrial card! This is one of my favorite 3D folders, and subconsciously, I must have taken a cue from your wonderful creation!
ReplyDeleteThank you so much! The professor is definitely one of my long standing favorite stamps sets.
Delete